I got a hankering for new music tonight, and since I still have a little cash in my bank account here at the end of the month, I figured I'd scratch that itch.
I picked up two new albums tonight, the first being a very excellent album by The Wombats, called A Guide to Love, Loss and Desparation . It's a pretty poppy album, that reminds me a lot of bands like Franz Ferdinand and Arctic Monkeys. It's good stuff, and I'm sure I'll be listening to it in the car a lot for a while. One stand out song from the album is this little ditty:
The other album I bought was Bon Iver's For Emma, Forever Ago. This album is definitely different from The Wombats, but of what I listened to tonight, it seems really good. I think I'll have to give it a least a couple of concentrated listens before I go up or down on it. Interestingly, Bon Iver (like Bright Eyes, I guess) is really a vehicle for one artist (in this case Justin Vernon, according to Wikipedia), and while that's not all that interesting, it is interesting that they released two albums while based in Raleigh(!).
Rather than embed a Bon Iver video, I'll embed a Bon Iver/Lykke Li video (I really dig Lykke Li. I have no idea why, but her music just gets me going for some reason):
Enjoy!
Wednesday, October 29, 2008


Monday, October 27, 2008
Deep fried fun...
Here in North Carolina, the State Fair just ended. One of my favorite parts of the fair is seeing what new thing that someone has decided to deep-fry. One year it's twinkies, the next it's oreos. I never end up getting deep-fried anything (I always look at the people cooking the stuff, and the people eating the stuff, and say "I don't want to be lumped into this group". Hey, I'm a snob on some things. I'm not ashamed to admit it), but the idea of deep-fried goodness is always pretty tempting.
Well today, I gave in to the temptation, and decided to take a shot at deep frying some candy bars.
If you google "deep-fried candy bars", you'll find lots of info on how to go about doing it, but it's actually pretty simple. All you need is:
1. a pot suitable for deep-frying (I used a 4 1/2 qt sauce pan),
2. some oil (I went with plain vegetable oil),
3. candy bars (in my case, I took a variety of snack-sized snickers, almond joys, kit kats, and reeses' peanut butter cups)
4. batter
5. and most importantly, a thermometer (you need one that will go up to ~400deg, not a regular meat thermometer)
I pulled a batter recipe off the internet, threw my candy bars in the freezer to get cold, and then after dinner, went to work.
The batter:
2 eggs
2tbsp oil
2 cups milk
2 tsp baking powder
2 cups flour
Whisk together the eggs, oil, and milk, and then add the baking powder and flour, and stir until smooth. Place in refrigerator to cool and thicken slightly.
After the batter was mixed up, I dumped about a half gallon of oil into my saucepan, and turned on the heat. Once the oil was at 375deg, I took out the batter and the candy bars, and made a little assembly line of candy bars, batter, oil, and paper-towel lined plate, so that I could have a relatively smooth operation.
From that point, it was pretty simple. You unwrap your candy bar (which should be close to frozen), dip it into the batter to coat it thoroughly, and then you drop it (carefully) into the hot oil. When the batter turns golden, it's done. Then you take out the candy bar and set it on a paper-towel lined plate to drain, and keep doing those steps until you're out of candy bars.
All told, it turned out about as well as I expected. I had some chocolate leakage, particularly with the peanut butter cups, but they all seemed to be edible when I got done. After plating up the candy bars, I dusted them with some powdered sugar and some cocoa powder, and the girls and I enjoyed a little taste of the state fair at home.
As for taste, they were pretty good, especially the almond joys. Those were nicely gooey, and I like coconut like nobody's business, so warm coconut and melty chocolate works for me. I thought the snickers were pretty good, too. The kids grabbed the kit-kats, and peanut butter cups before I could try them, but I was assured that they were good.
If I do it again, I think I'd add more flour to the batter, since it was a little thin. I'd also try dusting the candy bars with powdered sugar or something to get better adhesion between candy and batter. I think fruit would be good for this treatment, too, especially something like a banana (maybe chocolate dipped?) or an apple. Apparently, this year the big thing is deep-fried coke, and I have some ideas on that. And I'd have to try doing oreos, too....
Anyway, here are some pics of the whole thing:
The batter, cooling in the freezer:

The candy bars, next shelf down:

The oil (and thermometer!)

My assembly line:

The first candy bar, into the pot:

And several candy bars later, the oil is a little less clear:

I didn't make too many of these, since how many candy bars can you eat at one sitting?

Dusted with powdered sugar and cocoa:

Another view: (you can see part of Gretchen on the left and Bridget on the right)

A bite out of the almond joy:

And the snickers:

By the way, that's Bridget in the background.
Anyway, that's all I've got for today. Hope you enjoyed this post, and maybe you've even been inspired to take a shot at it yourself. I'm thinking deep-fried poptarts might be good...
Well today, I gave in to the temptation, and decided to take a shot at deep frying some candy bars.
If you google "deep-fried candy bars", you'll find lots of info on how to go about doing it, but it's actually pretty simple. All you need is:
1. a pot suitable for deep-frying (I used a 4 1/2 qt sauce pan),
2. some oil (I went with plain vegetable oil),
3. candy bars (in my case, I took a variety of snack-sized snickers, almond joys, kit kats, and reeses' peanut butter cups)
4. batter
5. and most importantly, a thermometer (you need one that will go up to ~400deg, not a regular meat thermometer)
I pulled a batter recipe off the internet, threw my candy bars in the freezer to get cold, and then after dinner, went to work.
The batter:
2 eggs
2tbsp oil
2 cups milk
2 tsp baking powder
2 cups flour
Whisk together the eggs, oil, and milk, and then add the baking powder and flour, and stir until smooth. Place in refrigerator to cool and thicken slightly.
After the batter was mixed up, I dumped about a half gallon of oil into my saucepan, and turned on the heat. Once the oil was at 375deg, I took out the batter and the candy bars, and made a little assembly line of candy bars, batter, oil, and paper-towel lined plate, so that I could have a relatively smooth operation.
From that point, it was pretty simple. You unwrap your candy bar (which should be close to frozen), dip it into the batter to coat it thoroughly, and then you drop it (carefully) into the hot oil. When the batter turns golden, it's done. Then you take out the candy bar and set it on a paper-towel lined plate to drain, and keep doing those steps until you're out of candy bars.
All told, it turned out about as well as I expected. I had some chocolate leakage, particularly with the peanut butter cups, but they all seemed to be edible when I got done. After plating up the candy bars, I dusted them with some powdered sugar and some cocoa powder, and the girls and I enjoyed a little taste of the state fair at home.
As for taste, they were pretty good, especially the almond joys. Those were nicely gooey, and I like coconut like nobody's business, so warm coconut and melty chocolate works for me. I thought the snickers were pretty good, too. The kids grabbed the kit-kats, and peanut butter cups before I could try them, but I was assured that they were good.
If I do it again, I think I'd add more flour to the batter, since it was a little thin. I'd also try dusting the candy bars with powdered sugar or something to get better adhesion between candy and batter. I think fruit would be good for this treatment, too, especially something like a banana (maybe chocolate dipped?) or an apple. Apparently, this year the big thing is deep-fried coke, and I have some ideas on that. And I'd have to try doing oreos, too....
Anyway, here are some pics of the whole thing:
The batter, cooling in the freezer:

The candy bars, next shelf down:

The oil (and thermometer!)

My assembly line:

The first candy bar, into the pot:

And several candy bars later, the oil is a little less clear:

I didn't make too many of these, since how many candy bars can you eat at one sitting?

Dusted with powdered sugar and cocoa:

Another view: (you can see part of Gretchen on the left and Bridget on the right)

A bite out of the almond joy:

And the snickers:

By the way, that's Bridget in the background.
Anyway, that's all I've got for today. Hope you enjoyed this post, and maybe you've even been inspired to take a shot at it yourself. I'm thinking deep-fried poptarts might be good...
Tuesday, October 21, 2008
Keeping in Tuna...
There are a number of recipes in my house that have been made so many times that they just come naturally. I don't need a cookbook, I don't need to think much, I can just pull it together because I've made it a gajillion times.
Tonight's dinner is one of those meals, which in my house we just call "Tuna Pasta". I originally got the recipe from the excellent Essentials of Classic Italian Cooking, by Marcella Hazan. If you don't own this book, you should. The pasta section alone is worth the book, but everything in it is great.
Tuna Pasta is penne pasta with a simple tuna and tomato sauce. It sounds basic, and it is, but the flavors (garlic, tuna, tomatoes, parsley, salt and pepper) work so well together that it's just perfection. In the time that you can make something like spaghetti from a jar (if you count the pasta time) or tuna helper, you can have something really good.
Tuna Pasta:
1 lb penne pasta
4 tbsp olive oil
1-2 tbsp minced garlic
1 15oz can diced tomatoes
1 tbsp butter
2 cans olive-oil packed tuna, drained and flaked
chopped parsley to taste (I like 3-4 tbsp or more)
salt (coarse kosher!) and pepper
Begin boiling water for pasta. Heat olive oil over med/med-lo heat, and add garlic. Cook until golden and fragrant but not brown. Add tomatoes (with juice) and bring to a simmer.
When water boils, add pasta. A few minutes before the pasta is done, take tomatoes off heat, and add butter, stirring to melt. Add tuna, and combine. When pasta's done, drain and return to pot. Add sauce, and stir to combine. Add chopped parsley, fresh ground pepper and salt, and stir again. Serve.
Now that's a simple dinner, but again, it's really good, and it works perfectly when you're worn out from a day of working for the man, and you just want to get dinner on the table.
With respect to the parsley, I use italian flat leaf since I think it tastes better and has a better mouth-feel, but you can use the curly kind. The curly kind can have more sand in its nooks and crannies, so you probably need to wash it a bit more than italian, but if you wash it like you'd do spinach, you should be ok.
You may be tempted to substitute either vegetable oil packed tuna or water packed tuna. If you must (and you really shouldn't, since the tuna is the focal point of the whole shebang, and so you should get the best you can), go for the water packed over the vegetable oil packed tuna. The veg oil tuna is a little cat-foody in texture, if you ask me.
Some pics:

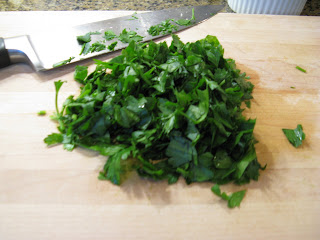


Finally, if you've made it this far, apologies for the lame pun in the title. It was either that or "you can tuna piano...", but I figured that one had been done to death.
Tonight's dinner is one of those meals, which in my house we just call "Tuna Pasta". I originally got the recipe from the excellent Essentials of Classic Italian Cooking, by Marcella Hazan. If you don't own this book, you should. The pasta section alone is worth the book, but everything in it is great.
Tuna Pasta is penne pasta with a simple tuna and tomato sauce. It sounds basic, and it is, but the flavors (garlic, tuna, tomatoes, parsley, salt and pepper) work so well together that it's just perfection. In the time that you can make something like spaghetti from a jar (if you count the pasta time) or tuna helper, you can have something really good.
Tuna Pasta:
1 lb penne pasta
4 tbsp olive oil
1-2 tbsp minced garlic
1 15oz can diced tomatoes
1 tbsp butter
2 cans olive-oil packed tuna, drained and flaked
chopped parsley to taste (I like 3-4 tbsp or more)
salt (coarse kosher!) and pepper
Begin boiling water for pasta. Heat olive oil over med/med-lo heat, and add garlic. Cook until golden and fragrant but not brown. Add tomatoes (with juice) and bring to a simmer.
When water boils, add pasta. A few minutes before the pasta is done, take tomatoes off heat, and add butter, stirring to melt. Add tuna, and combine. When pasta's done, drain and return to pot. Add sauce, and stir to combine. Add chopped parsley, fresh ground pepper and salt, and stir again. Serve.
Now that's a simple dinner, but again, it's really good, and it works perfectly when you're worn out from a day of working for the man, and you just want to get dinner on the table.
With respect to the parsley, I use italian flat leaf since I think it tastes better and has a better mouth-feel, but you can use the curly kind. The curly kind can have more sand in its nooks and crannies, so you probably need to wash it a bit more than italian, but if you wash it like you'd do spinach, you should be ok.
You may be tempted to substitute either vegetable oil packed tuna or water packed tuna. If you must (and you really shouldn't, since the tuna is the focal point of the whole shebang, and so you should get the best you can), go for the water packed over the vegetable oil packed tuna. The veg oil tuna is a little cat-foody in texture, if you ask me.
Some pics:


Finally, if you've made it this far, apologies for the lame pun in the title. It was either that or "you can tuna piano...", but I figured that one had been done to death.
Monday, October 20, 2008
On a roll...
I must be on a roll, because beer #2 is almost ready to have the yeast pitched, cooling off as I type this.
Tonight I made a "Columbus IPA", from the book Secrets of the Master Brewers, by Higgins et al. This trio also wrote the Homebrewer's Recipe Guide, which, as I've said before, I really dug.
The recipe was from Dan Gortemiller of the Pacific Coast Brewing Company, and one reason it appealed to me was that it was an extract beer, and at this point in my life I don't know that I'm all that interested in going all-grain. I think it'd be cool to say I'd made one, but the time involved, etc, it's just not all that appealing to me. So sue me.
Anyway, the recipe:
9 lbs light malt extract syrup
2 lbs crystal malt
4 oz columbus hops (13.9% alpha)
1 tsp irish moss
ale yeast
yeast nutrients
Steep grains for 20 minutes and discard. Off heat, add extract and hops, and boil for 20 minutes. Cool and pitch.
My brew store sells malt extract in 3.3 lb bags, so I went with 9.9 lbs of extract instead of 9.
I couldn't find columbus hops at my brew store, so I went with a combination of millenium hops (15% alpha) and Yakima magnum (13.1% alpha). I'm thinking "close enough". I also went with a smack pack of American Ale yeast, so there's my nutrients right there.
So, call it a "Yakima Millenium IPA", although it's probably not going to be very pale. For some strange reason, the recipe calls for 6 gallons of water, not the usual 5. I understand evaporation, but the boil is so short, surely a gallon of water won't get cooked off?
It's late, and there's not much more to write about, so I'll post a couple pics and that'll be that.
2 lbs of crystal malt:

4oz of hops (that's a lot of hops)
.jpg)
Tonight I made a "Columbus IPA", from the book Secrets of the Master Brewers, by Higgins et al. This trio also wrote the Homebrewer's Recipe Guide, which, as I've said before, I really dug.
The recipe was from Dan Gortemiller of the Pacific Coast Brewing Company, and one reason it appealed to me was that it was an extract beer, and at this point in my life I don't know that I'm all that interested in going all-grain. I think it'd be cool to say I'd made one, but the time involved, etc, it's just not all that appealing to me. So sue me.
Anyway, the recipe:
9 lbs light malt extract syrup
2 lbs crystal malt
4 oz columbus hops (13.9% alpha)
1 tsp irish moss
ale yeast
yeast nutrients
Steep grains for 20 minutes and discard. Off heat, add extract and hops, and boil for 20 minutes. Cool and pitch.
My brew store sells malt extract in 3.3 lb bags, so I went with 9.9 lbs of extract instead of 9.
I couldn't find columbus hops at my brew store, so I went with a combination of millenium hops (15% alpha) and Yakima magnum (13.1% alpha). I'm thinking "close enough". I also went with a smack pack of American Ale yeast, so there's my nutrients right there.
So, call it a "Yakima Millenium IPA", although it's probably not going to be very pale. For some strange reason, the recipe calls for 6 gallons of water, not the usual 5. I understand evaporation, but the boil is so short, surely a gallon of water won't get cooked off?
It's late, and there's not much more to write about, so I'll post a couple pics and that'll be that.
2 lbs of crystal malt:

4oz of hops (that's a lot of hops)
.jpg)
A taste of honey...
A reader (thanks Ian!) had a comment on my last beer entry, asking about using honey as the priming agent for your bottling. I originally started writing my reply as a comment, but figured it was a good topic for a blog post, so here's Ian's original question:
does the honey as the primer add flavor, color. I will be ready to bottle my first batch this coming week and i say the recipe and the honey primer sould neat
Ian,
I think the honey would add additional flavor, but I'm not so sure about color (considering you're adding somewhere around 1 1/2 cups of honey (plus water) to 5 gallons of beer).
The recipe I have for the bridal ale calls for 1 1/2 cups of honey as priming sugar, but I'm probably going to cut it back to 1 or 1 1/4 cups, since last time this beer was wayyy over-carbonated.
I have a book ("Designing Great Beers", by Ray Daniels) that points out some of the special concerns with honey. Honey has a delicate flavor to it (a good thing) and it has living organisms in it (not necessarily a good thing). So, you can't just add the honey to cold wort/beer.
This causes a problem, since boiling it for a long time would pretty much wipe out the flavors that honey imparts (and yes, I realize that the recipe I have has me boiling the honey right from the beginning. Next time, I'll add the honey later, so it doesn't boil as long). The Daniels book has a suggestion from the National Honey Board that is kind of impractical, but I'll post it anyway:
1. Dilute your honey to the gravity of the wort with water
2. Conduct a hold for two and a half hours at 176deg F under a CO2 blanket.
3. Add this directly to the beer at high krausen.
Like I said, a little impractical, since I don't think most people are setup to do the hold step (and I'm assuming "high krausen" means when your beer is fermenting hard).
But none of this addresses bottling. What I did for bottling was to combine my honey with about a cup of water in a saucepan, and I boiled it for a couple minutes. I figure that's long enough to kill whatever micro-organisms are present, and won't kill all the flavor. I'm using a "mountain honey" that seems to have more flavor than the kind that comes in the little bear bottle, so maybe that extra flavor will stick around.
I personally think a bigger issue with honey is that I wonder how it matches up sugar-wise with something like plain corn sugar. Typically, people add about 3/4 cup of corn sugar when priming for bottling. According to wikipedia, honey has 82.12 g of sugar per 100g of honey.
If corn sugar is "all sugar", then it's still not double the sugar of honey, so I don't know that my recipe's 1 1/2 cups of honey is right, if you're trying to carbonate a beer (and that would explain my over-carbonation problem).
This is a long winded way of saying, I think I'd go with about 1 cup of honey for my priming (which is what I plan to do), and I plan to boil it in a cup of water for ~5 minutes. That should do the trick, and next time, I'll play with the honey in the wort to see if I can keep it out of the boil for a while to better preserve the flavors).
One final thing I learned is that honey doesn't add much in the way body (since it's still mostly sugar), just some flavor and alcohol (more alcohol than the equivalent amount of malt, apparently).
does the honey as the primer add flavor, color. I will be ready to bottle my first batch this coming week and i say the recipe and the honey primer sould neat
Ian,
I think the honey would add additional flavor, but I'm not so sure about color (considering you're adding somewhere around 1 1/2 cups of honey (plus water) to 5 gallons of beer).
The recipe I have for the bridal ale calls for 1 1/2 cups of honey as priming sugar, but I'm probably going to cut it back to 1 or 1 1/4 cups, since last time this beer was wayyy over-carbonated.
I have a book ("Designing Great Beers", by Ray Daniels) that points out some of the special concerns with honey. Honey has a delicate flavor to it (a good thing) and it has living organisms in it (not necessarily a good thing). So, you can't just add the honey to cold wort/beer.
This causes a problem, since boiling it for a long time would pretty much wipe out the flavors that honey imparts (and yes, I realize that the recipe I have has me boiling the honey right from the beginning. Next time, I'll add the honey later, so it doesn't boil as long). The Daniels book has a suggestion from the National Honey Board that is kind of impractical, but I'll post it anyway:
1. Dilute your honey to the gravity of the wort with water
2. Conduct a hold for two and a half hours at 176deg F under a CO2 blanket.
3. Add this directly to the beer at high krausen.
Like I said, a little impractical, since I don't think most people are setup to do the hold step (and I'm assuming "high krausen" means when your beer is fermenting hard).
But none of this addresses bottling. What I did for bottling was to combine my honey with about a cup of water in a saucepan, and I boiled it for a couple minutes. I figure that's long enough to kill whatever micro-organisms are present, and won't kill all the flavor. I'm using a "mountain honey" that seems to have more flavor than the kind that comes in the little bear bottle, so maybe that extra flavor will stick around.
I personally think a bigger issue with honey is that I wonder how it matches up sugar-wise with something like plain corn sugar. Typically, people add about 3/4 cup of corn sugar when priming for bottling. According to wikipedia, honey has 82.12 g of sugar per 100g of honey.
If corn sugar is "all sugar", then it's still not double the sugar of honey, so I don't know that my recipe's 1 1/2 cups of honey is right, if you're trying to carbonate a beer (and that would explain my over-carbonation problem).
This is a long winded way of saying, I think I'd go with about 1 cup of honey for my priming (which is what I plan to do), and I plan to boil it in a cup of water for ~5 minutes. That should do the trick, and next time, I'll play with the honey in the wort to see if I can keep it out of the boil for a while to better preserve the flavors).
One final thing I learned is that honey doesn't add much in the way body (since it's still mostly sugar), just some flavor and alcohol (more alcohol than the equivalent amount of malt, apparently).
Tuesday, October 14, 2008
First beer of the fall...
Even though the name of this blog was originally "Piney Grove Homebrew", I've strayed farther afield than just brewing, spending just as much time talking about food, music, and "etcetera".
Well, starting today, I'm getting a little closer to the original roots of the blog. The weather's cooling off (brewing in hot humid North Carolina summers is not anyone's idea of fun), and when it's cool, it's start to thinking about not just drinking beer, but making it.
For the first beer of the fall, I want to take another shot at a beer I made last year, "Maura's Bridal Ale". When I made this last year, I thought it tasted great. It was smooth, with a nice hoppy character. However, it was also way overcarbonated, to the point where every beer was mostly foam it seemed like.
So even though it tasted good, there was a lot of room for improvement.
The recipe grain bill that I started with is as follows:
Maura's Bride Ale (from The Homebrewer's Recipe Guide...)
6 2/3 lbs light malt extract
1 lb crysal malt
1/2 lb flaked barley
1 lb honey
2 oz Willamette hops (bittering)
1 oz Liberty hops (finishing)
1 oz Cascade hops (finishing)
1 oz Cascade hops (dry hop)
1 tsp Irish Moss
1 pkg irish ale yeast (used a smack-pack)
1 1/2 c. honey (priming)
As in life however, nothing went totally according to plan. I didn't have the exact hops I was supposed to, so I substituted like so:
Palisade for the Willamette (using this cool "hop plug"), and Centennial for the Cascade.
And, while I was filling my grain bag with my crystal malt, I ended up accidentally dumping half of it in the sink (d'oh!). I salvaged what I could, but I was still short. I ended subsitituting some 60L caramel malt I had, so I expect that the beer will be a little darker than usual, but hey, that's life.
The actual brewing process went smoothly, with no real hiccups. While I was standing around waiting for the malt and flaked barley to "steep", I decided to take a shot at designing some beer labels. I think any amatuer brewer dreams of selling their beer in the store or in a bar, and I'm no different. Part of that dream is designing your labels (since your beer bottles have to have a label). I'd been thinking awhile about how I wanted my labels to look, and I'd settled on kind of a "paper-crafty" kind of look. I wanted it to look folk-arty, and I wanted it to be neat.
So, I raided the kids' construction paper drawer and went to work. I came up with two designs,
basically a "night" and "day" version of the same view.
When I first started brewing, I lived in Holly Springs, on a road called "Piney Grove-Wilbon Rd" (hence the "Piney Grove Homebrew/Kitchen" moniker). We had just under 8 acres, and I wanted the labels to reflect that in some fashion, and the "view" of the labels is generically the view from my front porch at that house.
I think the labels turned out ok. I need to come up with some little construction paper animals (like cows and pigs and horses) and maybe use different animals for different beers (like cows for a milk stout maybe, or brown cows for a chocolate stout, etc). It's definitely stretching my artistic talent to consider little animals right now, but maybe I can figure out something.
When I first scanned the art, the contrast was not so hot, and the labels didn't "pop". I used iPhoto's "enhance" feature on a whim, and sure enough, they were enhanced.
So here's night:

And here's day:

For both labels, I like how the construction paper gives texture to the picture, and I think it just looks neat.
I think the night turned out better for the first pass, since the contrast looks a little better, but I still like the day. The iPhoto enhance really made a difference on the day label.
Both pics have top and bottom borders so that, after I find a good stencil, I can put text on the borders (like "Piney Grove Brewery" on the top and the beer type on the bottom).
To wrap up, here are some shots of the brewing:
 My first hop plug. It's definitely not pretty.
The Piney Grove Homebrewery in all its garage-bound glory:

The brew kettle (above)
 My grains and hops (plus the recipe) on the trunk of my car
 My malt extracts sitting in pot of warm water.
Spent grains:

The boil in action:


Well, starting today, I'm getting a little closer to the original roots of the blog. The weather's cooling off (brewing in hot humid North Carolina summers is not anyone's idea of fun), and when it's cool, it's start to thinking about not just drinking beer, but making it.
For the first beer of the fall, I want to take another shot at a beer I made last year, "Maura's Bridal Ale". When I made this last year, I thought it tasted great. It was smooth, with a nice hoppy character. However, it was also way overcarbonated, to the point where every beer was mostly foam it seemed like.
So even though it tasted good, there was a lot of room for improvement.
The recipe grain bill that I started with is as follows:
Maura's Bride Ale (from The Homebrewer's Recipe Guide...)
6 2/3 lbs light malt extract
1 lb crysal malt
1/2 lb flaked barley
1 lb honey
2 oz Willamette hops (bittering)
1 oz Liberty hops (finishing)
1 oz Cascade hops (finishing)
1 oz Cascade hops (dry hop)
1 tsp Irish Moss
1 pkg irish ale yeast (used a smack-pack)
1 1/2 c. honey (priming)
As in life however, nothing went totally according to plan. I didn't have the exact hops I was supposed to, so I substituted like so:
Palisade for the Willamette (using this cool "hop plug"), and Centennial for the Cascade.
And, while I was filling my grain bag with my crystal malt, I ended up accidentally dumping half of it in the sink (d'oh!). I salvaged what I could, but I was still short. I ended subsitituting some 60L caramel malt I had, so I expect that the beer will be a little darker than usual, but hey, that's life.
The actual brewing process went smoothly, with no real hiccups. While I was standing around waiting for the malt and flaked barley to "steep", I decided to take a shot at designing some beer labels. I think any amatuer brewer dreams of selling their beer in the store or in a bar, and I'm no different. Part of that dream is designing your labels (since your beer bottles have to have a label). I'd been thinking awhile about how I wanted my labels to look, and I'd settled on kind of a "paper-crafty" kind of look. I wanted it to look folk-arty, and I wanted it to be neat.
So, I raided the kids' construction paper drawer and went to work. I came up with two designs,
basically a "night" and "day" version of the same view.
When I first started brewing, I lived in Holly Springs, on a road called "Piney Grove-Wilbon Rd" (hence the "Piney Grove Homebrew/Kitchen" moniker). We had just under 8 acres, and I wanted the labels to reflect that in some fashion, and the "view" of the labels is generically the view from my front porch at that house.
I think the labels turned out ok. I need to come up with some little construction paper animals (like cows and pigs and horses) and maybe use different animals for different beers (like cows for a milk stout maybe, or brown cows for a chocolate stout, etc). It's definitely stretching my artistic talent to consider little animals right now, but maybe I can figure out something.
When I first scanned the art, the contrast was not so hot, and the labels didn't "pop". I used iPhoto's "enhance" feature on a whim, and sure enough, they were enhanced.
So here's night:

And here's day:

For both labels, I like how the construction paper gives texture to the picture, and I think it just looks neat.
I think the night turned out better for the first pass, since the contrast looks a little better, but I still like the day. The iPhoto enhance really made a difference on the day label.
Both pics have top and bottom borders so that, after I find a good stencil, I can put text on the borders (like "Piney Grove Brewery" on the top and the beer type on the bottom).
To wrap up, here are some shots of the brewing:
 My first hop plug. It's definitely not pretty.
The Piney Grove Homebrewery in all its garage-bound glory:

The brew kettle (above)
 My grains and hops (plus the recipe) on the trunk of my car
 My malt extracts sitting in pot of warm water.
Spent grains:

The boil in action:


Sunday, October 12, 2008
Big Boss Brewery tour...
 This Saturday, I went on a tour of the Big Boss Brewery in Raleigh.
My company had put together a "company outing" to the brewery, and a friend and I took advantage of the opportunity. It wasn't like a special exclusive company thing, since the Big Boss tour is open to the public, but it was a good opportunity to meet a lot of people at my company that I'd never met before, and the organizer did a great job of making sure people met each other (and free beer is hard to pass up at any time).
Big Boss is different from most of our local breweries, since their regular line up of bottled beers does not include a pale ale or an IPA, rather going with varieties that are a little off the beaten path. So instead of the "normal" beers, Big Boss sells a belgian blond (the "Hell's Belle"), a kolsch (the "Angry Angel"), and a brown ale (the "Bad Penny").
The tour included two free beers, and I went for the Hell's Belle both times (I'll admit, the 7% alcohol attracted me, but the taste won me over). It's a good beer, with an interesting flavor profile that's hard to describe (I'd say it's smooth, with an almost raisiny undertone).
Once we'd all had a beer, the tour started, with the usual "here's where the mash happens", "here's fermentation", etc. It was a good tour (even though if you've been on one brewery tour, you've been on them all), and the staff was friendly and eager to answer questions. One thing I thought was interesting was that all the beer names come from WWII nose art. There really is a bomber named "Hell's Belle", another named "Angry Angel", etc. I think the brewery is missing a beat, though, since there's no information in any of the marketing material about that tie-in.
After the tour ended, everybody gathered for another beer, and the tour kind of started to break up. Fortunately, the brewery has a "tasting room" (ie, a bar) upstairs, and that was pretty cool. I can't say I've been to a lot of bars lately, but I can say I haven't been in a lot of bars that look like someone's basement. The folks at Big Boss have definitely crafted a neat bar, with the space broken into small rooms, with couches, ping pong tables, etc. It was nice, and evoked more of a "frat party" atmosphere than a bar. Maybe that's the way bars are now. Having kids has a way of bringing "going to bars" to a screeching halt.
When I was in the bar, I had their rendition of a pale ale, and it was pretty good, with a nice balance of malt and hops. I like a lot of hops, and I can't say that it was "super hoppy", but it was tasty.
After my pale ale, I decided to call it a day, since I had other stuff planned for the day, and any more beer would've left me pretty useless (although I guess some folks would say I don't need beer for that!), and I ended up having to take a nap on the couch afterwards anyway.
All in all, a good time. I'll go ahead and post my blurry pictures below (I don't know how people take good pictures with an iPhone):
.jpg) Obviously, with a line this long, it's a popular tour.
Obviously, with a line this long, it's a popular tour..jpg) My shaky-cam in action. This was the beer line, where we got our free beers (and when I took this, I'd no alcohol at all)
My shaky-cam in action. This was the beer line, where we got our free beers (and when I took this, I'd no alcohol at all).jpg) The introduction by (I believe) one of the brewers, and the sales director. (But I could be wrong).
The introduction by (I believe) one of the brewers, and the sales director. (But I could be wrong)..jpg) The mash stop of the tour.
The mash stop of the tour..jpg) A big crowd...
A big crowd....jpg)
.jpg) I got bored during the mash stop of the tour and took these two pics of the brewery. It's a big space, larger than the Carolina Brewing Company (interestingly, a friend told me that their tour is all you can drink. I think I know my brewery tour stop....).
I got bored during the mash stop of the tour and took these two pics of the brewery. It's a big space, larger than the Carolina Brewing Company (interestingly, a friend told me that their tour is all you can drink. I think I know my brewery tour stop....)..jpg) Fermentation room. It's not obvious, but there are what I think are cooling jackets on the fermentation vessels to keep them cool, and the room was pretty chilly.
Fermentation room. It's not obvious, but there are what I think are cooling jackets on the fermentation vessels to keep them cool, and the room was pretty chilly..jpg) A crappy pic of my Hell's Belle.
A crappy pic of my Hell's Belle.And that's pretty much all I've got on Big Boss. It's a good brewery that makes great beer. The people I talked to from the brewery all seemed really nice, and I'd definitely like to spend some time in the tasting room. If you're in the Raleigh area looking for something to do, you could do alot worse than to take their tour.
Also, if you're looking for a good blog to read, check out this. My new friend Ross (from whom I almost bought a pretty nice Triumph motorcycle) just bought a Honda Ruckus scooter, and he's started a blog about it. So check it out, and give him some hits.
And go Rays.
Also, if you're looking for a good blog to read, check out this. My new friend Ross (from whom I almost bought a pretty nice Triumph motorcycle) just bought a Honda Ruckus scooter, and he's started a blog about it. So check it out, and give him some hits.
And go Rays.
Subscribe to:
Posts (Atom)