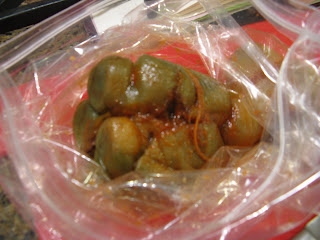
Monday, December 29, 2008

The fat is where the flavor is...


When I was in school for the second time, I took a class called "Food Selection and Preparation" (which was a great class, btw), and I remember vividly the instructor, Dr Frank Conforti, saying "the fat is where the flavor is".

I have to say, truer words have never been spoken. When I think of my favorite foods, they are all high in fat (or at least have fat as an essential component). Potatoes au gratin? fat (cream and cheese). Steak? rib-eye, well marbled and with nice fat on the edges and in the middle. Pasta? Cream sauce, or something like a tuna sauce (packed in oil, of course). Gravy? Fat in the roux. The list is endless.

The larger point is, of course, that fat really is where the flavor is, and cultures where they recognize that, and practice moderation instead of deprivation, are usually much happier and healthy (ie, the "french paradox").

Well, you can add this week's recipe to the list of "high fat goodness", because there is nothing low fat about this dish. This time, I decided to take a whack at "red-braised pork". Pretty much every cuisine has a couple "low and slow" dishes, and sichuan cuisine is no different.

Red-braised pork is basically pork belly, cut into chunks, and then braised for a couple of hours in a sweet/salty sauce until the meat is really tender and the fat has a really cool texture.
This dish is definitely a different kind of dish. For one thing, most people are used to eating pork belly in the form of bacon, and when you cut up the belly into chunks like stew meat, you get these really cool bands of meat and fat. When you cook them for a while, the meat gets really tender, but the fat doesn't melt away, but rather it gets a unique texture. Tasty, but different. Along with the fat, pork belly comes with the skin attached, and you don't remove the skin when you cook it. I had serious doubts about this part, thinking that the belly chunks would have this rubbery strip along the top, but I was way off base. The skin has a lot of collagen in it, and over the course of several hours, it all gets rendered out into the sauce. To be honest, you don't even realize it's skin. (I know my youngest daughter loved this dish, and ate all that I gave her, skin, meat and fat, and she is ridiculously picky, as only a 5yr old can be).

I served the pork with some rice, and also some roasted green beans. I was inspired to roast the beans because I was at a party a couple of weeks ago, and somehow I got involved in a conversation about roasting green beans, and I figured since I needed something to serve with the pork, I'd have a go at roasting beans, and then I'd have something else to write about.
Roasting green beans is pretty much like roasting asparagus, I think. You clean your beans, trimming them if necessary, then you dry them, toss them with some olive oil, kosher salt and fresh ground pepper, and then spread them out on a sheet pan. Roast them in a 450deg oven for about 10-12 minutes, and you're done. The only thing I'd change about the way they turned out was that I used pretty thin beans (haricot vert thin), and I think this would work better with thick beans.

So there you go, some fat pork, some roasted beans, and some nice rice, and a sauce that's pretty darn good. What's not to like?


Red Braised Pork:
1 - 1 1/4 lb pork belly, with skin
2 in. piece of ginger, unpeeled.
2 scallions, white and green parts
1 tbsp peanut oil
2 cups chicken stock
1 tbsp dark soy sauce
2 tbsp shaoxing rice wine
3/4 tsp salt
3 tbsp brown sugar
1/2 of a star anise

Blanch pork for a few minutes in boiling water, and then rinse in cold water. Cut into 2 -3 in. chunks, leaving skin on. Crush ginger with flat side of a cleaver or chef's knife, and cut scallions into 3 to 4 sections.

Heat oil in a dutch oven, and brown pork chunks on all sides. Work in batches if necessary. After all the pork is browned, add it all to the pot, and add stock and the rest of the ingredients. Bring to a boil, and then simmer uncovered for 2-3 hours over a low flame.

When meat is fork tender, if the braising liquid is not reduced enough (it should coat a spoon), remove the pork to a serving dish, and reduce the braising liquid over high heat until it coats a spoon. Pour braising liquid over the pork and serve immediately with rice.


Roasted Green Beans:
1/2 -1 lb green beans (thick)
2-3 tbsp olive oil
coarse kosher salt
fresh ground pepper

Clean and trim beans as necessary, and dry. Toss in a bowl with olive oil, salt and pepper, and then spread beans on a sheet pan. Roast in a 450deg oven for 10-12 minutes, or until nicely browned.
Serve hot.

Tuesday, December 16, 2008

Chinese food for people who don't like chinese food...


It's there on every menu you get at a Chinese restaurant. Nuggets of pork, coated in a greasy batter, covered with a gloppy sweet sauce colored a shade of red that couldn't possibly come from nature. I'm talking, of course, about sweet and sour pork (or chicken). It's the "safe" choice on the menu, the one that the person who doesn't like chinese food always gets (although, if that's the chinese food you're eating, is it any wonder you don't like the food?).

This week's recipe is, you guessed it, sweet and sour pork. But it's light years from what you get in most restaurants, with a brown sauce that manages the balance between sweet and sour quite well. I'm not much on "sweet and sour" anything (although my wife always gets this, go figure), but I have to admit this dish was pretty good. Aside from having to deep-fry, it was pretty easy, and came together in a flash.

Sweet-and-Sour Pork:

3/4 lb boneless pork loin, cut into 1/2 in thick strips
peanut oil (for frying)

batter:
2 eggs
3/8 cup cornstarch (or more)

marinade:
1/2 tsp salt
2 tsp shaoxing rice wine

sauce:
1/4tsp salt
3 tbsp white sugar
2 tbsp black chinese vinegar
1 tsp light soy sauce
3 3/4 tsp cornstarch
3 scallions, green parts only, finely sliced
3 tbsp peanut oil
2 tsp finely chopped ginger
2 tsp finely chopped garlic
3/4 c chicken stock
1 tsp sesame oil

Place pork strips in a bowl, add marinade ingredients, mix, and let sit for 20 minutes.
Combine the first 5 sauce ingredients (salt, sugar, vinegar, soy and cornstarch) in a bowl and set aside.

Heat oil for deep frying to 300deg. Beat eggs together and add cornstarch to make a thick batter (you may need more cornstarch, that's fine). When the oil's hot, add the pork to the batter and stir to coat the strips. Deep fry the pork strips in batches for about 3 minutes or so, just to cook the pork through. You may need to stir the pork with a chopstick or metal spoon to prevent clumping. Drain on paper towels.
After all the pork is fried, raise the temperature of the oil to 375deg, and deep fry the pork in one or two batches, this time until crisp and golden. Drain on paper towels and keep warm while you prepare the sauce.

Heat the oil in a clean wok or saute pan over medium heat. Add the garlic and ginger and stir fry until fragrant (about 30 seconds). Add the stock, bring to a boil, and then add the sauce ingredients you prepared ahead of time. Stir briskly to thicken.
When it's reached the desired consistency, add the scallions and sesame oil.
Put the pork in a serving dish, pour the sauce over, and serve immediately with rice.

And there you go, sweet and sour pork that it is far removed and vastly superior to the "red glop".

Saturday, November 22, 2008

Climbing a tree...


Next recipe up in my attempt to cook through Land of Plenty is "Ants climbing a tree".
It's yet another noodle dish, and it's also a classic sichuan noodle dish. These kind of recipes are great, since they're pretty simple dishes without a lot of ingredients or advance preparation, and they're packed with flavor.

In the case of "Ants...", this was about as quick and easy as you can get. The noodles are bean thread noodles, so they don't need to be boiled, just soaked in hot water for about 15 minutes (I guess that's kind of a wash, though, since you're either boiling for 15 minutes or soaking for 15 minutes).

The recipe, like many of the noodle recipes in the book, doesn't use much meat (only 1/4 lb of pork (but I went with ground turkey, since it was on sale)), and other than some scallions that need to be sliced, there's no prep other than measuring out the various seasonings, which include chili-bean paste, light and dark soy sauces, and shaoxing rice wine. Other than some chicken broth (and I admit, I cheated and went with the stuff in a box because I didn't feel like thawing out some homemade), that's it.


I paired the noodles with an eggplant dish I made long ago (see the write up )
The eggplant dish paired well, since the eggplant softened some of the heat of the noodles (which were, like many of the dishes in this cookbook, pretty spicy), even though the eggplant was liberally spiced with chili flakes. Plus, I plain love cilantro, and I made sure to liberally sprinkle cilantro all over.

Overall, tasty, fast, and good on a wednesday night. What's not to like?

Here's the recipe for "Ants climbing a tree":
1/4 lb bean thread noodles
1 tsp shaoxing rice wine (or sherry)
1/4 lb ground pork or beef (or turkey)
peanut oil
3 tsp light soy sauce
1 1/2 tbsp chili bean paste
1 2/3 cups chicken stock
1/2 tsp dark soy sauce
3 scallions, green parts only, finely sliced

Soak the noodles in hot water for 15 minutes. While the noodles soak, add the rice wine and a couple pinches of salt to the ground meat, and mix well.

Stir fry the ground meat with 1 tsp of light soy sauce in 2 tbsp oil in a wok (or frying pan) until lightly browned and crispy. Add the chili bean paste, and stir fry until the oil is red and fragrant. Add the stock and the drained noodles, and stir well. Add the dark soy (for color) and season with the remainder of the light soy to taste.

Bring the stock to a boil, and simmer over medium heat until most of the liquid has evaporated/absorbed. Add the scallions, mix well, and serve.

Sunday, November 16, 2008

Belly laughs...


My second Land of Plenty recipe is a recipe for "salt-fried pork". This recipe's important to me, because it's the first dish I've ever made that uses pork belly as an ingredient.

As a properly hip food guy, I know that pork belly is a kind of cool ingredient, popping up in cookbooks, and on menus from places like Momofuku and even the local Jujube. For such a hip ingredient, though, if you limit your shopping to "regular" markets like Lowe's, Harris Teeter and the like, you'll never find pork belly.
It's in that "ethnic" ghetto, where other meats that don't conform to the generic grocery vision live (like liver, or veal breast, or even lamb for the most part). To get something like pork belly, you have to go over to the asian market side of things (although, having never been to an ethnic market that wasn't asian, I can't say if you could find pork belly in a hispanic market, for example). Regardless of where you find it, I think of pork belly as "uncured bacon" or "streak o' lean". The belly I bought just looked like slab bacon (but differently colored, since it wasn't cured), and it had the skin still attached (perfect for cracklings, I guess. I wonder if chinese cooking has those?).

Enough belly talk. My recipe today was salt-fried pork, and it was described in the book as being a very "homestyle" recipe. I don't know enough about homestyle chinese cooking, but it was easy, and the flavors were definitely basic. I was just looking for a pork belly recipe that didn't take a lot of work, since I've had a busy week, and I wanted to be able to bang something out relatively quickly for dinner.

My mis-en-place:


Salt-fried pork
1/2 lb boneless pork belly, sliced into thin 2x3in slices
2-3 baby leeks or 5 scallions, white and green parts
peanut oil
salt to taste
1 1/2 tbsp Sichuanese chili-bean paste
1 1/2 tbsp fermented black beans
1 tsp light soy sauce
1/2 tsp sugar

Heat 3 tbsp oil in a wok or large pan until hot, but not smoking. Add pork and stir-fry briskly for 3-4 minutes, until oil has cleared and pork has lost most of its water content. Add 1/8 tsp of salt halfway thru cooking. Push pork to one side of pa, and tilt pan/wok until oil runs into the space cleared. Drop chili bean paste and black beans into oil and stir-fry for 30 secs until oil is red and fragrant. Mix in pork slices, add soy and sugar, and throw in leeks/scallions. Stir fry until leeks/scallions are just cooked.
Serve over rice.


Of the ingredients, the chili-bean paste is your typical "hot chili deal", but I thought the black beans were pretty unique. I made sure to taste some before I started cooking, and I guess I'd describe them as salty beans with a complex chocolaty flavor. It's hard to nail down, but they're definitely a special flavor. Overall, it was a good quick meal. The girls looked at it in their usual skeptical way, but I thought it was tasty. The leftovers are definitely going to make it to lunch this week. There are a ton (ok, more than a few) pork belly recipes in the book, so this won't be the last time I cook belly, and I'm looking forward to trying other recipes. Once you get past the "belly" name, it's just a fatty cut of meat, and lord knows, things like shank, oxtails, short-ribs and what-not may look or sound gross, but they're all really really good eating, so there's no reason why belly can't slide into that repertoire.

Music to cook by tonight:
Spoon's "The book I write":
http://www.youtube.com/watch?v=KNmG3A7YQto

Tuesday, November 11, 2008

Tingly Lips...


I'm excited about cooking from Fuchsia Dunlop's Land of Plenty, since I've always wanted to understand Chinese cuisine, and I'm hoping this will be the way I finally "get it".

The book is pretty well laid out, and a good portion of the book is taken up with a discussion of
technique, ingredients, customs and what-not. It's all interesting stuff, and Chinese cuisine
definitely differs tremendously from "western" food in many ways, so reading the background
material has been quite valuable for me.

The first recipe I made from the book was actually a "pre-recipe", and was the "chili oil" described in the "pantry" section, since the first dish I planned to cook was a rendition of dan-dan noodles, which requires chili oil.

Chili oil is a common condiment in Sichuan cuisine, and it couldn't be easier to make.
What you do is, you take 1/2 cup of red pepper flakes (I ran a bunch of whole chilis through my mini food processor to make the flakes), put them in a quart mason jar and add a couple of pieces of star anise.

Then you heat 2 cups of peanut (or canola oil) with a crushed piece of ginger (the recipe said until "smoking hot", but I just went to about 375-400degs, since I didn't want to burn the house down).
Once it's heated, you take it off the heat for about 10-15 minutes to cool to around 225-250 deg, and then (carefully!) pour it into the mason jar. Then you just let the oil sit for about a day or two, and there you go, homemade chili oil.


As I said above, my first dish from the book was a rendition of dan-dan noodles. Dan-Dan noodles are a famous streetfood from China, and like many "famous foods" from a particular area (like, say, North Carolina BBQ), there are as many versions as there are people. In Dunlop's book, there are 2 versions of dan-dan, and in our house we've enjoyed a different version, the recipe for which came from Cook's illustrated.

The Cook's version (which has been Americanized a bit) is interesting, b/c it shares so little
with the recipes in Dunlop's book (which have some common ingredients between them).
The Cook's version is something like this (I'm going from memory, since I lost the recipe long ago, and I just cook from memory on this one anyway):

Cook's Illustrated:

1/2 lb ground pork
2 tbsp sherry or shaoxing wine
fresh ground pepper
1 tbsp oil
4 garlic cloves minced
1 inch piece ginger, minced
1/2 - 1 tsp red chili flakes
3 tbsp light soy sauce
2 tbsp oyster sauce
1 tbsp rice wine vinegar
4 tbsp creamy peanut butter
1 - 1 1/2 cups chicken broth
8 oz linguine or asian noodles
Bean sprouts
sliced scallions (white and green parts)
Combine the port with the sherry, 1 tbsp soy sauce and ground pepper, and set aside to marinate for 15 min.
Bring a pot of water to boil, and boil noodles according to package directions. They need to be "done", not just "al dente".
Meanwhile, combine oyster sauce, vinegar, remaining soy sauce, and the peanut butter in a bowl, and stir until smooth. Stir in chicken broth and stir until smooth. Set aside.
Heat a pan over high heat until hot, add oil, and stir fry pork until browned. Add garlic, ginger and red pepper flakes and fry for 30 secs or until fragrant. Add sauce, and turn heat down to low, and simmer until thickened to desired consistency.
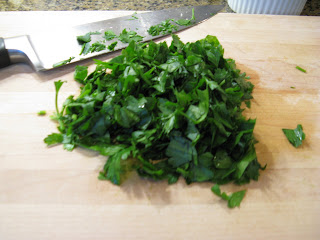
Serve over noodles, garnished with bean sprouts and scallions

Land of Plenty:
8 oz dried chinese noodles
sauce:
1 tbsp peanut oil
4 tbsp Sichuanese ya cai or Tianjin preserved vegetable, diced small
3 scallions, green parts only, finely sliced
1 1/2 tbsp light soy
1/2 tbsp dark soy
2 tbsp chili oil (to taste)
1 1/2 tsp black chinese vinegar
1/2 - 1 tsp ground roasted sichuan peppercorns
topping:
a little oil
4 oz ground pork (I actually used turkey, b/c it was on sale)
1 tsp shaoxing rice wine or sherry
2 tsp light soy
salt to taste

Heat the 1 tbsp of oil, and stir-fry preserved veg for about 30 secs, until fragrant. Set aside.
Stir-fry ground pork, and as meat separates, add wine and soy sauce. Continue to cook until well browned, but not too dry.
Combine the fried vegetable and the rest of the sauce ingredients in a bowl and mix together. Cook the noodles according to the package, and add to the sauce. Sprinkle with the meat mixture, and then stir well to combine. Serve.


As you can see from the two recipes, there are slight similarities, but the (what I'm assuming is) "more authentic" version is much simpler, and lighter. It also had some ingredients that I'd never had before, like the "ya cai" (preserved mustard tuber) and some of the other sauce ingredients. The ya cai was actually pretty good, even though it looked kind of alien.
Note: whoops! This is NOT ya cai (which is actually mustard greens that have been preserved. This is sichuanese preserved vegetable, which is not the same thing. My bad. Please continue reading, and don't think less of me for the mistake).

It tasted sort of like a garlicky, chilified pickle, which I guess is what it is. The sauce also had black chinese vinegar in it, which is somewhat sweet, and not very high in acid. The other ingredient that I'd never had before was dark soy sauce, which is thicker than the light soy, and more intense.

So how'd the Dunlop version taste? They were good. Different from the Cook's version, primarily because the Cook's version has the peanut butter in it, which gives it a "saucy" texture. The LoP version is a simpler affair, and without the peanut butter to soften the flavors, it's a different experience. When the book first mentioned Sichuan peppercorns, the author made a point of saying that the peppercorns aren't really hot, but that impart a pleasant tingling sensation to the lips of the person eating. I can definitely vouch for that, b/c when I was done eating my noodles, my lips were a-tingling! (I was also sweating, that chili oil definitely is hot)
Here's a pic of the finished product:

So, I've gotten my feet wet on this cookbook, and I like it. It's got some weaknesses (for example, there's not a lot of detail on how to prepare certain ingredients, like the preserved vegetable(ya cai)), but overall, the subject matter is interesting enough to overcome that.

The next dish I'm cooking will be the salt-fried pork, which will be my first experience cooking
pork-belly, so I'm looking forward to this!

Stay tuned.

Saturday, November 8, 2008

A trip to the market...


I've been trying to think of ways to spice up my blog, and one idea that appeals to me is doing my own version of "French Laundry at Home". If you're not familiar with this blog (and you should take the time to read some of the posts, it's a great read), the idea is that the author cooked her way thru the "French Laundry Cookbook", and wrote about it. That's a pretty impressive feat. I remember reading thru the book when I checked it out from the library and thinking, "wow, not a home cooking cookbook".

For my take on "cooking your way thru a book, one recipe at a time", I'm thinking about taking on Fuchsia Dunlop's "Land of Plenty", which is a pretty good cookbook focusing on Sichuan cuisine.
To that end, Bridget (my 5 year old daughter) and I took a trip this afternoon to the local Asian market to pick up some pantry staples.

Here in the Triangle, we have a very large Asian population, which we owe to the presence of 3 top flight universities (NCSU, UNC, and Duke) as well as a slew of smaller schools, and to the vibrant high-tech/biotech scene here. This presence translates to a pretty big Asian market here in Cary, called, fittingly enough, the Grand Asia Market.

I enjoy going to places like this, because it allows me to get some idea of what it's like to be both a minority and a stranger in a strange land. Walking in, you're confronted with signs in languages you (probably) don't understand, and very few people of your own ethnicity. Personally, I think it's good for you to experience this kind of dislocation, since it allows you to empathize at least somewhat with other minorities. For example, african-americans make up roughly 12% of the US population, so anytime an african-american walks into a room, it's likely that they will be the only black person in the room. Walking into the Grand Asia market, you know exactly how they feel.

But enough liberal guilt. Shopping at the Grand Asia market is definitely different from Krogering. I was primarily interested in pantry items, so I skipped the fresh fruit and veg area, but I got sucked into the fish and meat departments, and I gotta say, the next time I'm buying fish, I know where I'm going. They had a ton of fish, including live fish (which at least guarantees that it's fresh) and crabs, and it all looked pretty good.

Live fish:

Stone crabs: (they had turtles too, but I didn't get any pics of those)
Live blue crabs:


A broad selection of not-living fish, which was much more appealing than what you get at the regular grocery:
Next to the fish department was the meat department. Since I haven't tried any of the meat there, I can't say it's better than a usual grocery, but the selection was far more interesting. The only thing I bought was pork belly (which seems to be a hip kind of meat lately), but there was a ton of stuff that I can honestly say, I've never considered buying. But if I'm ever looking for fresh bung, I know where to go (snicker).

There was a great variety of cuts that you just never see at the regular grocery:

Next time you get a cornish hen, this is the "non-prettied up" version:


I'm open minded, and I can see eating testicles, but who eats uteri?

And, when you can't think of anything else to eat:
Please don't think I'm making fun of the meat selection. While I wouldn't eat some of the stuff I saw, I did see things I would eat, like pork liver and pork belly. Even though I think pictures of pork uteri are funny, someone is obviously eating it, since they're selling it fresh, and when you get down to it, meat is meat, regardless of where it comes from on the animal.

After the "pleasure" portion of the trip, checking out the meat and fish, we went and got the things I was really here for, which were the pantry staples. The hard part of shopping in a place like this is that little is in english, so you need to kind of parse what english is there to get an idea of what you're buying (or be familiar enough with the appearance of what you're buying to be confident you're buying the right thing. I think I managed to muddle thru alright, getting most of what I wanted.

Spices galore:

More noodles than you can shake a stick at:

My haul:

Pork belly, light and dark soy sauce, rice wine, rice vinegar, black vinegar, sichuan pepper corns, hot peppers, preserved vegetables, etc.

So, all in all, a good trip (we also went to a local motorcycle dealership for some parts for a bike I'm working on, and I think Bridget had more fun at the market than at the motorcycle dealership). I got most of what I needed, and I think I'm ready to take on Fuchsia Dunlop's very good cookbook. In the coming days/weeks/months, I hope to flesh out my plan a little better. I'm excited at the idea of cooking everything from a book, but it's kind of intimidating, especially since I'm sure there are things that I won't be able to find anyone to eat (and then I'll have to eat it!). Right now, I need to work out what I'm going to cook and when.

So keep reading!

Music notes:
I've been on a jag of buying lately. I picked up the new Blitzen Trapper album Furr, which is really really good. I went to see the Drive-By Truckers and The Hold Steady the other night here in Raleigh, and they totally kicked a**. I have all but one DBT album, but I only had one Hold Steady album (Stay Positive), so I went and bought "Boys and Girls in America". Awesome stuff. If you haven't heard the Hold Steady, you're missing out, and you owe it to yourself to rectify the matter. I also picked up "Boxer" by the National. It's an album that's hard to figure. Sometimes I listen to it and think "mellow", other times not. But all in all, a great album, that I've listened to repeatedly in the last couple of days. Regardless, three great albums in a week is a pretty good string of music.

Wednesday, October 29, 2008

New Music Wednesday (Wombats and Bon Iver)

I got a hankering for new music tonight, and since I still have a little cash in my bank account here at the end of the month, I figured I'd scratch that itch.
I picked up two new albums tonight, the first being a very excellent album by The Wombats, called A Guide to Love, Loss and Desparation . It's a pretty poppy album, that reminds me a lot of bands like Franz Ferdinand and Arctic Monkeys. It's good stuff, and I'm sure I'll be listening to it in the car a lot for a while. One stand out song from the album is this little ditty:


The other album I bought was Bon Iver's For Emma, Forever Ago. This album is definitely different from The Wombats, but of what I listened to tonight, it seems really good. I think I'll have to give it a least a couple of concentrated listens before I go up or down on it. Interestingly, Bon Iver (like Bright Eyes, I guess) is really a vehicle for one artist (in this case Justin Vernon, according to Wikipedia), and while that's not all that interesting, it is interesting that they released two albums while based in Raleigh(!).

Rather than embed a Bon Iver video, I'll embed a Bon Iver/Lykke Li video (I really dig Lykke Li. I have no idea why, but her music just gets me going for some reason):


Enjoy!

Monday, October 27, 2008

Deep fried fun...

Here in North Carolina, the State Fair just ended. One of my favorite parts of the fair is seeing what new thing that someone has decided to deep-fry. One year it's twinkies, the next it's oreos. I never end up getting deep-fried anything (I always look at the people cooking the stuff, and the people eating the stuff, and say "I don't want to be lumped into this group". Hey, I'm a snob on some things. I'm not ashamed to admit it), but the idea of deep-fried goodness is always pretty tempting.

Well today, I gave in to the temptation, and decided to take a shot at deep frying some candy bars.
If you google "deep-fried candy bars", you'll find lots of info on how to go about doing it, but it's actually pretty simple. All you need is:
1. a pot suitable for deep-frying (I used a 4 1/2 qt sauce pan),
2. some oil (I went with plain vegetable oil),
3. candy bars (in my case, I took a variety of snack-sized snickers, almond joys, kit kats, and reeses' peanut butter cups)
4. batter
5. and most importantly, a thermometer (you need one that will go up to ~400deg, not a regular meat thermometer)

I pulled a batter recipe off the internet, threw my candy bars in the freezer to get cold, and then after dinner, went to work.

The batter:
2 eggs
2tbsp oil
2 cups milk
2 tsp baking powder
2 cups flour

Whisk together the eggs, oil, and milk, and then add the baking powder and flour, and stir until smooth. Place in refrigerator to cool and thicken slightly.

After the batter was mixed up, I dumped about a half gallon of oil into my saucepan, and turned on the heat. Once the oil was at 375deg, I took out the batter and the candy bars, and made a little assembly line of candy bars, batter, oil, and paper-towel lined plate, so that I could have a relatively smooth operation.

From that point, it was pretty simple. You unwrap your candy bar (which should be close to frozen), dip it into the batter to coat it thoroughly, and then you drop it (carefully) into the hot oil. When the batter turns golden, it's done. Then you take out the candy bar and set it on a paper-towel lined plate to drain, and keep doing those steps until you're out of candy bars.

All told, it turned out about as well as I expected. I had some chocolate leakage, particularly with the peanut butter cups, but they all seemed to be edible when I got done. After plating up the candy bars, I dusted them with some powdered sugar and some cocoa powder, and the girls and I enjoyed a little taste of the state fair at home.

As for taste, they were pretty good, especially the almond joys. Those were nicely gooey, and I like coconut like nobody's business, so warm coconut and melty chocolate works for me. I thought the snickers were pretty good, too. The kids grabbed the kit-kats, and peanut butter cups before I could try them, but I was assured that they were good.

If I do it again, I think I'd add more flour to the batter, since it was a little thin. I'd also try dusting the candy bars with powdered sugar or something to get better adhesion between candy and batter. I think fruit would be good for this treatment, too, especially something like a banana (maybe chocolate dipped?) or an apple. Apparently, this year the big thing is deep-fried coke, and I have some ideas on that. And I'd have to try doing oreos, too....

Anyway, here are some pics of the whole thing:

The batter, cooling in the freezer:

The candy bars, next shelf down:

The oil (and thermometer!)

My assembly line:

The first candy bar, into the pot:

And several candy bars later, the oil is a little less clear:

I didn't make too many of these, since how many candy bars can you eat at one sitting?

Dusted with powdered sugar and cocoa:

Another view: (you can see part of Gretchen on the left and Bridget on the right)

A bite out of the almond joy:

And the snickers:

By the way, that's Bridget in the background.

Anyway, that's all I've got for today. Hope you enjoyed this post, and maybe you've even been inspired to take a shot at it yourself. I'm thinking deep-fried poptarts might be good...

Tuesday, October 21, 2008

Keeping in Tuna...

There are a number of recipes in my house that have been made so many times that they just come naturally. I don't need a cookbook, I don't need to think much, I can just pull it together because I've made it a gajillion times.

Tonight's dinner is one of those meals, which in my house we just call "Tuna Pasta". I originally got the recipe from the excellent Essentials of Classic Italian Cooking, by Marcella Hazan. If you don't own this book, you should. The pasta section alone is worth the book, but everything in it is great.
Tuna Pasta is penne pasta with a simple tuna and tomato sauce. It sounds basic, and it is, but the flavors (garlic, tuna, tomatoes, parsley, salt and pepper) work so well together that it's just perfection. In the time that you can make something like spaghetti from a jar (if you count the pasta time) or tuna helper, you can have something really good.

Tuna Pasta:
1 lb penne pasta
4 tbsp olive oil
1-2 tbsp minced garlic
1 15oz can diced tomatoes
1 tbsp butter
2 cans olive-oil packed tuna, drained and flaked
chopped parsley to taste (I like 3-4 tbsp or more)
salt (coarse kosher!) and pepper

Begin boiling water for pasta. Heat olive oil over med/med-lo heat, and add garlic. Cook until golden and fragrant but not brown. Add tomatoes (with juice) and bring to a simmer.
When water boils, add pasta. A few minutes before the pasta is done, take tomatoes off heat, and add butter, stirring to melt. Add tuna, and combine. When pasta's done, drain and return to pot. Add sauce, and stir to combine. Add chopped parsley, fresh ground pepper and salt, and stir again. Serve.

Now that's a simple dinner, but again, it's really good, and it works perfectly when you're worn out from a day of working for the man, and you just want to get dinner on the table.
With respect to the parsley, I use italian flat leaf since I think it tastes better and has a better mouth-feel, but you can use the curly kind. The curly kind can have more sand in its nooks and crannies, so you probably need to wash it a bit more than italian, but if you wash it like you'd do spinach, you should be ok.
You may be tempted to substitute either vegetable oil packed tuna or water packed tuna. If you must (and you really shouldn't, since the tuna is the focal point of the whole shebang, and so you should get the best you can), go for the water packed over the vegetable oil packed tuna. The veg oil tuna is a little cat-foody in texture, if you ask me.

Some pics:


Finally, if you've made it this far, apologies for the lame pun in the title. It was either that or "you can tuna piano...", but I figured that one had been done to death.

Monday, October 20, 2008

On a roll...

I must be on a roll, because beer #2 is almost ready to have the yeast pitched, cooling off as I type this.
Tonight I made a "Columbus IPA", from the book Secrets of the Master Brewers, by Higgins et al. This trio also wrote the Homebrewer's Recipe Guide, which, as I've said before, I really dug.

The recipe was from Dan Gortemiller of the Pacific Coast Brewing Company, and one reason it appealed to me was that it was an extract beer, and at this point in my life I don't know that I'm all that interested in going all-grain. I think it'd be cool to say I'd made one, but the time involved, etc, it's just not all that appealing to me. So sue me.

Anyway, the recipe:
9 lbs light malt extract syrup
2 lbs crystal malt
4 oz columbus hops (13.9% alpha)
1 tsp irish moss
ale yeast
yeast nutrients

Steep grains for 20 minutes and discard. Off heat, add extract and hops, and boil for 20 minutes. Cool and pitch.

My brew store sells malt extract in 3.3 lb bags, so I went with 9.9 lbs of extract instead of 9.
I couldn't find columbus hops at my brew store, so I went with a combination of millenium hops (15% alpha) and Yakima magnum (13.1% alpha). I'm thinking "close enough". I also went with a smack pack of American Ale yeast, so there's my nutrients right there.
So, call it a "Yakima Millenium IPA", although it's probably not going to be very pale. For some strange reason, the recipe calls for 6 gallons of water, not the usual 5. I understand evaporation, but the boil is so short, surely a gallon of water won't get cooked off?

It's late, and there's not much more to write about, so I'll post a couple pics and that'll be that.

2 lbs of crystal malt:

4oz of hops (that's a lot of hops)

A taste of honey...

A reader (thanks Ian!) had a comment on my last beer entry, asking about using honey as the priming agent for your bottling. I originally started writing my reply as a comment, but figured it was a good topic for a blog post, so here's Ian's original question:

does the honey as the primer add flavor, color. I will be ready to bottle my first batch this coming week and i say the recipe and the honey primer sould neat

Ian,
I think the honey would add additional flavor, but I'm not so sure about color (considering you're adding somewhere around 1 1/2 cups of honey (plus water) to 5 gallons of beer).
The recipe I have for the bridal ale calls for 1 1/2 cups of honey as priming sugar, but I'm probably going to cut it back to 1 or 1 1/4 cups, since last time this beer was wayyy over-carbonated.
I have a book ("Designing Great Beers", by Ray Daniels) that points out some of the special concerns with honey. Honey has a delicate flavor to it (a good thing) and it has living organisms in it (not necessarily a good thing). So, you can't just add the honey to cold wort/beer.
This causes a problem, since boiling it for a long time would pretty much wipe out the flavors that honey imparts (and yes, I realize that the recipe I have has me boiling the honey right from the beginning. Next time, I'll add the honey later, so it doesn't boil as long). The Daniels book has a suggestion from the National Honey Board that is kind of impractical, but I'll post it anyway:
1. Dilute your honey to the gravity of the wort with water
2. Conduct a hold for two and a half hours at 176deg F under a CO2 blanket.
3. Add this directly to the beer at high krausen.

Like I said, a little impractical, since I don't think most people are setup to do the hold step (and I'm assuming "high krausen" means when your beer is fermenting hard).

But none of this addresses bottling. What I did for bottling was to combine my honey with about a cup of water in a saucepan, and I boiled it for a couple minutes. I figure that's long enough to kill whatever micro-organisms are present, and won't kill all the flavor. I'm using a "mountain honey" that seems to have more flavor than the kind that comes in the little bear bottle, so maybe that extra flavor will stick around.

I personally think a bigger issue with honey is that I wonder how it matches up sugar-wise with something like plain corn sugar. Typically, people add about 3/4 cup of corn sugar when priming for bottling. According to wikipedia, honey has 82.12 g of sugar per 100g of honey.
If corn sugar is "all sugar", then it's still not double the sugar of honey, so I don't know that my recipe's 1 1/2 cups of honey is right, if you're trying to carbonate a beer (and that would explain my over-carbonation problem).
This is a long winded way of saying, I think I'd go with about 1 cup of honey for my priming (which is what I plan to do), and I plan to boil it in a cup of water for ~5 minutes. That should do the trick, and next time, I'll play with the honey in the wort to see if I can keep it out of the boil for a while to better preserve the flavors).

One final thing I learned is that honey doesn't add much in the way body (since it's still mostly sugar), just some flavor and alcohol (more alcohol than the equivalent amount of malt, apparently).

Tuesday, October 14, 2008

First beer of the fall...

Even though the name of this blog was originally "Piney Grove Homebrew", I've strayed farther afield than just brewing, spending just as much time talking about food, music, and "etcetera".

Well, starting today, I'm getting a little closer to the original roots of the blog. The weather's cooling off (brewing in hot humid North Carolina summers is not anyone's idea of fun), and when it's cool, it's start to thinking about not just drinking beer, but making it.

For the first beer of the fall, I want to take another shot at a beer I made last year, "Maura's Bridal Ale". When I made this last year, I thought it tasted great. It was smooth, with a nice hoppy character. However, it was also way overcarbonated, to the point where every beer was mostly foam it seemed like.
So even though it tasted good, there was a lot of room for improvement.

The recipe grain bill that I started with is as follows:
Maura's Bride Ale (from The Homebrewer's Recipe Guide...)
6 2/3 lbs light malt extract
1 lb crysal malt
1/2 lb flaked barley
1 lb honey
2 oz Willamette hops (bittering)
1 oz Liberty hops (finishing)
1 oz Cascade hops (finishing)
1 oz Cascade hops (dry hop)
1 tsp Irish Moss
1 pkg irish ale yeast (used a smack-pack)
1 1/2 c. honey (priming)


As in life however, nothing went totally according to plan. I didn't have the exact hops I was supposed to, so I substituted like so:
Palisade for the Willamette (using this cool "hop plug"), and Centennial for the Cascade.

And, while I was filling my grain bag with my crystal malt, I ended up accidentally dumping half of it in the sink (d'oh!). I salvaged what I could, but I was still short. I ended subsitituting some 60L caramel malt I had, so I expect that the beer will be a little darker than usual, but hey, that's life.

The actual brewing process went smoothly, with no real hiccups. While I was standing around waiting for the malt and flaked barley to "steep", I decided to take a shot at designing some beer labels. I think any amatuer brewer dreams of selling their beer in the store or in a bar, and I'm no different. Part of that dream is designing your labels (since your beer bottles have to have a label). I'd been thinking awhile about how I wanted my labels to look, and I'd settled on kind of a "paper-crafty" kind of look. I wanted it to look folk-arty, and I wanted it to be neat.
So, I raided the kids' construction paper drawer and went to work. I came up with two designs,
basically a "night" and "day" version of the same view.

When I first started brewing, I lived in Holly Springs, on a road called "Piney Grove-Wilbon Rd" (hence the "Piney Grove Homebrew/Kitchen" moniker). We had just under 8 acres, and I wanted the labels to reflect that in some fashion, and the "view" of the labels is generically the view from my front porch at that house.

I think the labels turned out ok. I need to come up with some little construction paper animals (like cows and pigs and horses) and maybe use different animals for different beers (like cows for a milk stout maybe, or brown cows for a chocolate stout, etc). It's definitely stretching my artistic talent to consider little animals right now, but maybe I can figure out something.
When I first scanned the art, the contrast was not so hot, and the labels didn't "pop". I used iPhoto's "enhance" feature on a whim, and sure enough, they were enhanced.

So here's night:

And here's day:


For both labels, I like how the construction paper gives texture to the picture, and I think it just looks neat.
I think the night turned out better for the first pass, since the contrast looks a little better, but I still like the day. The iPhoto enhance really made a difference on the day label.
Both pics have top and bottom borders so that, after I find a good stencil, I can put text on the borders (like "Piney Grove Brewery" on the top and the beer type on the bottom).

To wrap up, here are some shots of the brewing:

My first hop plug. It's definitely not pretty.

The Piney Grove Homebrewery in all its garage-bound glory:


The brew kettle (above)
My grains and hops (plus the recipe) on the trunk of my car

My malt extracts sitting in pot of warm water.

Spent grains:

The boil in action: